Q. 소스 충돌이 나서 Override and Commit 을 해야하는 상황인데, Override and Commit 이 없다?!

A. Mark as Merged 후 Commit 하면 된다.. 


https://stackoverflow.com/questions/1768691/subclipse-override-and-commit


반응형

text 형태가 아닌 파일을 grep 했을 때 발생하는 에러.

> cat engine.log | grep 502

> Binary file (standard input) matches 


파일 형식은 아래와 같이 확인이 가능

> file engine.log

> engine.log: ASCII English text, with very long lines

출처 : https://unix.stackexchange.com/questions/335716/grep-returns-binary-file-standard-input-matches-when-trying-to-find-a-string


-a 옵션을 붙여주어 해결

> cat engine.log | grep 502 -a

> 결과생략


출처 : https://bbs.archlinux.org/viewtopic.php?id=32328

반응형


1. 참조객체 복사시 주의.

list , array 와 같은 참조객체 복사시 주소값만 복사하는 얕은복사 주의.

참고 : https://developyo.tistory.com/59?category=688588


2. Transaction 사용시 주의. 

1) @Transactional 어노테이션이 붙은 A method 가 동일한 클래스 내에 위치한 메소드 B에 의해 호출될 때, A의 트랜잭션 어노테이션은 작동하지 않음.

2) 스프링의 Transaction은 checked exception 은 rollback 대상으로 보지않음.

참고 : https://developyo.tistory.com/51


3. overloading 관련

오버로딩은 상속이 되지 않음.

참고 : https://stackoverflow.com/questions/31141834/overloading-method-on-extended-class


오버로딩은 컴파일 단계에서.

오버라이딩은 런타임 단계에서.

참고 : http://blog.naver.com/PostView.nhn?blogId=skykingkjs&logNo=150175869201&redirect=Dlog&widgetTypeCall=true


4. @value 주입시 주의사항

@Value 필드 주입의 경우 Object 가 생성되고 난 후 주입되므로 

Object 생성자를 타는 시점에선 @Value 값이 null.

@Value 로 주입받은 값을 생성자에서 사용시 @PostConstruct 사용 할 것

참고 : https://stackoverflow.com/questions/46035971/spring-autowired-and-value-on-property-not-working

참고 : https://jeong-pro.tistory.com/167


[@PostConstruct 사용법]

1
2
3
4
5
6
7
8
9
10
11
12
13
14
15
16
17
18
19
20
21
22
23
24
25
26
27
28
29
30
31
32
33
34
35
36
37
38
39
40
41
42
43
44
45
46
47
48
49
50
51
52
53
54
55
56
57
58
59
60
61
62
63
64
65
66
67
 
@Component("CustomChatManager")
public class CustomChatManager {
    
    protected final static Logger logger = LoggerFactory.getLogger(CustomChatManager.class);
        
    @Value("#{systemProperties['jboss.service.mode']}")    
    private String CHATJAR;    
 
    private ChatManager cm;
    
    private static final String CHAT_SERVER_LOCAL = "http://1";    //로컬
    private static final String CHAT_SERVER_DEV = "http://2";    //개발 
    private static final String CHAT_SERVER_DEV2 = "http://3";    
    private static final String CHAT_SERVER_OPER = "http://4";    
    
    @PostConstruct    
    public void init() throws Exception{
        this.cm = ChatManager.getInstance();
        this.setServerURI();
    }    
    //채팅서버 URI 세팅
    private void setServerURI() throws Exception {
        
        String uri = CHAT_SERVER_LOCAL;
        
        if(CHATJAR != null) {
            switch(CHATJAR) {
            case "local":
                uri = CHAT_SERVER_LOCAL;
                break;
            case "dev":
                uri = CHAT_SERVER_DEV;
                break;
            case "tb":
            case "bmt":
                uri = CHAT_SERVER_DEV2;
                break;
            case "oper"
                uri = CHAT_SERVER_OPER;
                break;
            default :
                uri = CHAT_SERVER_OPER;
                break;
            }
        }
        
        URI suri = null;
        logger.info("chatjar : " + CHATJAR + "\nchat uri : " + uri);
        
        try {
            suri = new URI(uri);
            cm.setServerURI(suri);
        } catch (URISyntaxException ue) {
            logger.error("set chat jar failed ! : {}" , ue);
            throw ue;
        } catch (Exception e) {
            logger.error("set chat jar failed ! : {}" , e);
            throw e;
        }
    }
    
    public ChatManager getInstance() throws Exception {
        return this.cm;
    }
}
 
cs


5. 스프링+멀티스레드 환경에서 멤버변수 선언 주의

Thread safe 하다는 건 public 메소드 안의 로컬 변수가 Thread safe 하다는 의미일 뿐, 멤버변수가 Thread safe 하다는 의미가 아니다.

멤버변수는 주입에 사용되는 Bean 만 사용할 것

참고 : https://beyondj2ee.wordpress.com/2013/02/28/%EB%A9%80%ED%8B%B0-%EC%93%B0%EB%A0%88%EB%93%9C-%ED%99%98%EA%B2%BD%EC%97%90%EC%84%9C-%EC%8A%A4%ED%94%84%EB%A7%81%EB%B9%88-%EC%A3%BC%EC%9D%98%EC%82%AC%ED%95%AD/


6. DI 와 new 생성자의 혼용 주의

new 생성자로 A 객체 생성, A 객체 내에서 특정 객체 DI 로 주입받는 경우

DI 에서 null pointer exception 발생.


7. Interceptor 내의 멤버변수 사용시 주의

Interceptor 내의 prehandle , posthandle 메소드 내에서 class(Interceptor)의 멤버변수(전역변수)를 사용하여 처리경과시간을 찍을 경우 시간 맞지않음. (prehandle 에서 time set 한 후, posthandle 에서 time get 할 경우 엉터리 시간이 나옴)

context 흐름을 따르므로 prehandle --> ~ --> posthandle 간 흐름에서 parameter 로 들고 다녀야 함


8. Interceptor 에서 body 값 출력 주의

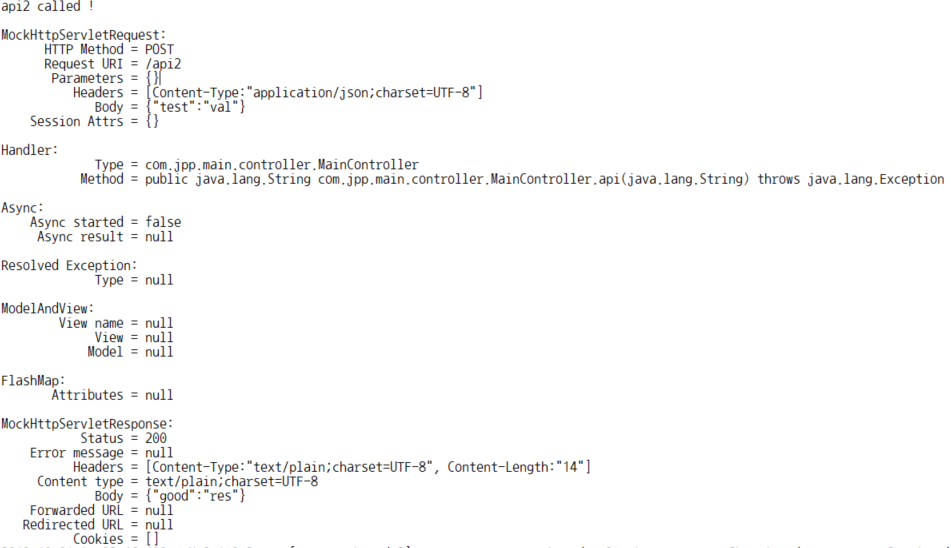
Interceptor 에서 body 에 담겨온 클라이언트의 request parameter 를 찍는 경우

실제 요청을 받아 로직을 수행하는 controller 나 service 에서 request parameter를 꺼내 쓸 수 없음.

stream은 1회성이므로 한번 열리면 다시 열어 쓸 수 없음.

--> 위 경우 filter 로 request parameter를 wrapping 하거나, 아예 AOP 로 로그를 찍어야 함.


9. DELETE 방식 호출시 주의사항

outputStream 사용하지 말것. 사용시 에러남.

참고 : https://developyo.tistory.com/8?category=688588


10. 이너클래스 사용시 주의사항

이너클래스는 바깥쪽에 있는 변수 중, final 로 선언된 변수만 사용이 가능.


11. 파일 업로드/다운로드 시 directory 권한 주의

파일을 로컬의 특정 경로 밑에 생성하여 특정 외부 서버에 ftp 로 전송하는 배치가 있을 때,

로컬의 특정 경로에 권한이 어떻게 되어있는지 필히 확인할 것.

만약 로컬의 특정 경로가 root 755 와 같이 되어있어, was계정이 w 가 불가 할 경우 에러발생.


12. mybatis version 낮은 경우 update 쿼리에서 selectkey 사용 불가


13. git hub repository 연동시 DB 정보를 비롯해 숨겨야 할 정보 유의하여 연동하기

gitignore 작성한 후 repository 연동해야 기록 자체가 남질 않음.


반응형

카카오톡 이름 알아내는 법(실명 알아내기)


위와 같이 자신의 이름 대신 이모티콘/이모지나 기타 문구를 사용하고 있는 사용자의 실명을 알아내보자.


이름을 알아내고자 하는 사용자와 1:1채팅 방을 만든 후, 송금 버튼을 눌러준다.


카카오 송금 화면에 진입하면 위처럼 실명을 알아낼 수 있다.

※카카오계좌를 한 번 이라도 사용한 사용자인 경우에만 위 방법으로 알아낼 수 있다


반응형

'etc. > etc.' 카테고리의 다른 글

개발자에게 유용한 툴 정리  (0) 2020.01.14
좋은 블로그/글 모음  (0) 2019.11.11
Image to ASCII : 이미지를 문자로 변환하기  (0) 2019.09.20
Maven error (Missing artifact error)  (2) 2019.09.04
윈도우 정품 마크 숨기기  (0) 2019.08.29

file upload하기 : $.ajax, XMLHttpRequest() 사용


$.ajax 및 XMLHttpRequest 를 사용하여 파일업로드를 할 수 있습니다. 

$.ajax 는 jQuery 라이브러리로 내부적으로 javascript 의 XMLHttpRequest 객체를 사용합니다.

XMLHttpRequest를 사용하기 편하게 구현해 놓은게 $.ajax 라고 보시면 될 듯 합니다.


파일 업로드 form 이 존재하며 파일 업로드 function을 호출 하는 jsp와

파일 업로드 function 이 분리되어 있는 fileupload.js 로 크게 두 파일로 소스를 분리했습니다.


jQuery version 은 3.1.1 이며,  jQuery 버전이 다른 경우 제대로 동작하지 않을 수 있습니다. 


[fileupload.js]

jQuery lib 사용시 $.ajax 사용하여 파일업로드를 구현

1
2
3
4
5
6
7
8
9
10
11
12
13
14
15
16
17
18
19
20
21
22
23
24
25
26
27
28
29
30
31
32
33
34
35
36
37
38
39
40
41
42
43
44
45
46
47
48
49
50
51
52
53
 
var httpFileUpload = {
    uploadStart : function(fileElement, callback){
        const file = fileElement[0];
        if(!file){
            throw new Error("file not exists");
        } else {
            const uploadFile = file.files[0];
            if(!uploadFile || !uploadFile.size || !uploadFile.name || uploadFile.size === 0){
                throw new Error("upload file is required");
            } else {
                    const url = "http://uploadurl";
                    const form = new FormData();
                    form.append('file', file.files[0]);
                    var returnObj = new Object();
                    
                    $.ajax({
                        type    : 'post',
                        url        : url,
                        data     : form,
                        cache : false,
                        enctype : 'multipart/form-data',
                        contentType : false,
                        processData : false,
                        timeout : 600000
                    })
                    .done(function (data, textStatus, xhr) {
                        var tmp = null;
                        switch(xhr.status){
                            case 201:
                                console.log("uploaded!");
                                returnObj.result_cd = "1";
                                break;
                            case 404:
                                console.log("404");
                                returnObj.result_cd = "404";
                                break;
                            default:
                                console.log("not 201 404");
                                returnObj.result_cd = "0";
                                break;
                        }
                        callback(returnObj);
                    })
                    .fail(function(data, textStatus, errorThrown){
                        console.log("http upload fail : "+errorThrown);
                        returnObj.result_cd = "0";
                        callback(returnObj);
                    });
            }
        }
    }    
}
cs

$.ajax 의 .done .fail 의 callback param은 여기를 참고


[fileupload.js]

javascript 로 파일업로드를 구현

1
2
3
4
5
6
7
8
9
10
11
12
13
14
15
16
17
18
19
20
21
22
23
24
25
26
27
28
29
30
31
32
33
34
35
36
37
38
39
var httpFileUpload = {
    
    uploadStart : function(fileElement, callback){
        const file = fileElement[0];
 
        if(!file){
            alert("file not exists");
            throw new Error("file not exists");
        }
 
        const url = "http://uploadurl";
 
        const form = new FormData();
        form.append('file', file.files[0]);
 
        const returnObj = new Object();
        
        const request = new XMLHttpRequest();
        
        request.onload = function(e){
            if(request.status == 201){
                console.log("uploaded!");
                returnObj.result_cd = "1";
            } else if(request.status == 404){
                console.log("404");
                returnObj.result_cd = "404";
                callback(returnObj);
            } else {
                console.log("not 201 404");
                callback(returnObj);
                returnObj.result_cd = "0";
            }
            callback(returnObj);
        };
        request.open('POST', url);
        request.send(form);
    }
}
 
cs


[위 모듈(fileupload.js)을 사용하는 jsp]

1
2
3
4
5
6
7
8
9
10
11
12
13
14
15
16
17
18
19
20
21
22
23
24
25
26
27
28
29
30
31
32
33
34
35
36
37
38
<%@ page language="java" contentType="text/html; charset=UTF-8"    pageEncoding="UTF-8"%>
<!DOCTYPE html>
<html>
<head>                       
<script type="text/javascript" src="${rquest.getContextPath()}/resources/js/jquery-3.1.1.min.js"></script>
<script>
function uploadStartFront(){
    httpFileUpload.uploadStart($("#file"), function(returnData){
        if(returnData.result_cd == "1"){
            alert("업로드 성공");
        } else {
            if(typeof returnData.result_msg !== "undefined"){
                alert("업로드 실패 " + "[" + returnData.result_cd + "]");
            } else {
                alert("업로드 실패 " + "[" + returnData.result_cd + ":" + returnData.result_msg +"]");
            }
        }
        console.log(returnData);
    });
}
</script>
<meta http-equiv="Content-Type" content="text/html; charset=utf-8">
<title>Insert title here</title>
</head>
 
<body>
    <div class="inner_wrap" style="padding-left : 350px;">
    <form id ="frm" class="form-horizontal" method="post" action="" enctype="multipart/form-data">
        <input type="file" class="form-control1" id="file" name="file" style="border:0px solid black;"/>
        <button type="button" class="btn_s" onclick="javascript:uploadStartFront();">업로드시작</button>
        <button type="button" class="btn_s">취소</button>
    </form>
    </div>
</body>
 
<script type="text/javascript" src="${rquest.getContextPath()}/resources/js/fileupload.js"></script>
 
</html>
cs


파일을 내부 was 로 송신할 때나, 외부 서버로 송신할 때나 목적지 주소(위 코드에서 url)를 제외하곤 코드가 다를게 없지만, 외부 서버로 파일을 송신하는 경우 CORS 및 mixed contents 문제를 유의해야 합니다.


CORS 및 mixed contents 에 대한 내용은 추후 공부 및 정리하여 포스팅 하겠습니다.

반응형

$.ajax .done .fail ajax .done .fail 사용시 response data 가져오기


$.ajax 호출시 success, error 혹은 done, fail 을 사용하여 서버 통신 결과를 콜백 처리 할 수 있다.


그 중 done, fail 을 사용시 어떤 값들을 뽑아 낼 수 있는지 알아보았다.

jQuery document 를 읽어보니 아래와 같은 부분을 찾을 수 있었다.

.done 의 경우 순서대로 data, textStatus, jqXHR 을 리턴해주고 있었다.


[Example]

1
2
3
4
5
6
7
8
9
10
11
12
13
14
15
16
17
18
19
20
21
22
23
24
25
26
27
28
29
30
31
32
33
34
35
36
37
38
39
40
41
42
43
44
45
46
var httpFileUpload = {
    
    getAddr : function(fileElement, callback){
        
        const file = fileElement[0];
        if(!file){
            throw new Error("file Element is required");
        } else {    
            const uploadFile = file.files[0];
            
            if(!uploadFile || !uploadFile.size || !uploadFile.name || uploadFile.size === 0){
                throw new Error("upload file is required");
            } else {
                console.log("file size : " + uploadFile.size+"\nfile name : " + uploadFile.name);
                 
                var params = {
                        filename : uploadFile.name,
                        filesize : uploadFile.size,
                        provider : "TEST"
                    };
                
                $.ajax({
                    type    : "POST",
                    url        : "/sample.do",
                    contentType: "application/json",
                    dataType:"json",
                    data     : JSON.stringify(params)    
                })
                .done(function (data, textStatus, xhr) {
                    console.log(xhr);
                    if(data.result_cd == "1"){
                        alert("success!");
                    } else {
                        alert("에러발생["+data.result_cd+"]");
                        console.log(data.result_msg);
                        callback(data);
                    }
                })
                .fail(function(data, textStatus, errorThrown){
                    console.log("fail in get addr");
                    callback(data);
                });
            }
        }
    }
}
cs

30 번 라인에서 xhr 을 console log 로 찍어보았다.

(console.log 는 브라우저의 개발자도구(크롬기준 F12) -> console 탭에서 확인이 가능하다)

위와 같은 데이터들이 xhr 내에 담겨있음을 확인 할 수 있다.


그렇다면 http Status code 를 기준으로 분기처리를 하고 싶다면 어떻게 해야할까?

1
2
3
4
5
6
7
8
9
10
11
12
13
14
15
16
17
18
19
20
21
//생략
.done(function (data, textStatus, xhr) {
    //alert("data : " + data + "\nstatus : " +status +  "\nxhr" + xhr.status);
    switch(xhr.status){
        case 201:
            cp_funcs.alert('uploaded!');
            callback(data);
            break;
        case 404:
            cp_funcs.close();
            cp_funcs.alert('not found');
            callback(data);
            break;
        default:
            cp_funcs.close();
            cp_funcs.alert('Error');
            callback(data);
            break;
    }
});
//생략
cs

위(4~18 line)처럼 xhr내의 status를 뽑아 내면 된다.

반응형

setInterval , setTimeout


setInterval

일정 시간 간격을 두고 특정 함수를 실행시키고자 할 때 사용.

특정서버와의 통신을 N 회까지 retry(재시도) 시키는 기능, 타이머 기능(초시계 등) 등의 기능 개발시 사용


[실행]

1
var loopInterval = setInterval("loopFunc.checkLooping()"1*2000);
cs

: 2초 뒤 loopFunc.checkLooping() 함수 실행


[중단]

1
2
3
if(loopInterval){ 
    clearInterval(loopInterval); 
}
cs

: loopInterval 이 defined 이면(인터벌이 정의되어있으면) 인터벌을 제거.


※ 사용시 주의사항

setInterval은 실행시 "시간간격 > 실행 > 시간간격 > 실행 ~" 과 같은 순서로 실행된다.

(위에서 예를 든 코드는 2초뒤에 loopFunc.checkLooping() 함수를 최초로 실행한다)

따라서 "실행 > 시간간격 > 실행 > 시간간격 ~" 과 같이 함수 실행을 우선적으로 시킨 후 시간간격을 두고 싶다면,

1
2
loopFunc.checkLooping();
var loopInterval = setInterval("loopFunc.checkLooping()"1*2000);
cs

위와 같이 setInterval함수를 호출하기 앞서 함수를 강제로 한 번 호출해주면 된다.


setTimeout

일정 시간 후에 특정 함수를 1회 실행시키고자 할 때 사용

강제로 시간 텀을 두어 함수를 실행시켜야 할 때, java 에서의 Thread.sleep(~); 과 같이 시간 텀을 강제로 줄 필요가 있는 경우(딜레이) 사용


[실행]

1
setTimeout(function(){sample()}, 1000);
cs

: 1초 뒤 sample() 함수 실행


반응형

MobaXTerm : SSH Tunneling (터널링) 사용하기


[사용하는 케이스]

로컬 >> 특정 외부 서버가 방화벽이 뚫려 있지 않아 로컬에서 특정 외부 서버의 api 호출이 불가(로컬 : 테스트 불가)

개발 >> 특정 외부 서버가 방화벽이 뚫려 있어 개발 서버에서 특정 외부 서버의 api 호출이 가능(개발 : 테스트 가능)

위와 같을 때 단위 테스트를 위해 매번 개발 서버에 소스를 배포 후 테스트 하는게 여간 번거로운게 아니다.


이 때, 개발서버 Tunneling 설정을 통해 로컬에서 특정 외부 서버 호출이 가능하다.

실제론 로컬 >> 개발서버(터널링) >> 특정 외부 서버 순서의 흐름으로 호출됨


[설정방법]

1. Tunneling 클릭


2. New SSH tunnel 클릭


1 : 포워딩할 포트

2 : 순서대로, 터널링 시켜줄 서버(개발서버)의 ip/login ID/port(22)

3 : 순서대로, 목적지 서버(로컬과 방화벽이 뚫리지 않은, 개발서버와 방화벽이 뚫린 외부 서버)의 ip/port

입력 후 Save.


※ local port forwarding 을 사용하므로 (상단부 라디오 버튼 참고) property 수정 필요

소스상에서 본래 목적지인 100.0.0.1:8080 외부서버에 통신을 요청하고 있었다면

로컬호스트:1번에적은포트 (예시-127.0.0.1:8085)

로 요청을 하도록 소스를 수정해야함.

(로컬(예시-127.0.0.1:8085) 호출 > 개발서버 > 실제 목적지인 외부서버 순서로 호출됨)


추가한 세팅에서 Start 버튼을 눌러주어야 실질적인 터널링이 작동함.


※ MobaXterm personal edition 을 설치한 경우, 터널링은 최대 3개만 지원가능하다..

반응형

DB연동 및 mybatis 설정이 끝났다면

junit 을 이용하여 설정이 잘 되었는지 확인을 해보자.


1. Test 코드 작성

1
2
3
4
5
6
7
8
9
10
11
12
13
14
15
16
17
18
19
20
21
22
23
24
25
26
27
28
29
package com.jpp;
 
import org.junit.Test;
import org.junit.runner.RunWith;
import org.springframework.beans.factory.annotation.Autowired;
import org.springframework.boot.test.context.SpringBootTest;
import org.springframework.test.context.junit4.SpringRunner;
 
import com.jpp.main.config.MybatisConfig;
import com.jpp.main.dao.MainDAO;
import com.jpp.main.vo.UserVO;
 
@RunWith(SpringRunner.class)
@SpringBootTest
public class MainServiceTest {
    
    @Autowired
    private MainDAO mainDao;
    
    @Test
    public void getUserList() throws Exception {
        
        for(UserVO vo : mainDao.getUserList()) {
            System.out.println(vo.getName());
        }
        
    }
}
 
cs

Spring Framework 에서 Bean 을 가져오기위해 @ContextConfiguration(classes = ~) 을 사용했지만 

Spring Boot 는 @*Test(@SpringBootTest 를 포함한 각종 Test 어노테이션) 사용시 Bean 을 알아서 가져온다고 한다.

참고 및 부분 발췌

※JUnit 4 사용시 @RunWith(SpringRunner.class) 를 꼭 달아주어야 한다.

※ @SpringBootTest(classes = {MainDAO.class, MybatisConfig.class}) 와 같이 테스트에 사용할 특정 Bean 을 지정해 줄 수 도 있다.

※ ApplicationContext (스프링컨텍스트) 에서 DAO bean 을 .getBean으로 가져와 테스트 하는 것 또한 가능하다.

1
2
3
4
5
6
7
8
9
10
11
12
13
14
15
16
17
18
19
20
21
22
23
24
25
26
27
28
29
30
31
32
33
34
35
package com.jpp;
 
import org.junit.Test;
import org.junit.runner.RunWith;
import org.mybatis.spring.SqlSessionTemplate;
import org.springframework.beans.factory.annotation.Autowired;
import org.springframework.boot.test.context.SpringBootTest;
import org.springframework.context.ApplicationContext;
import org.springframework.test.context.junit4.SpringRunner;
 
import com.jpp.main.config.MybatisConfig;
import com.jpp.main.dao.MainDAO;
import com.jpp.main.vo.UserVO;
 
@RunWith(SpringRunner.class)
@SpringBootTest(classes = {MainDAO.class, MybatisConfig.class})
public class MainServiceTest {
    
    //@Autowired
    //private MainDAO mainDao;
    
    @Autowired
    private ApplicationContext context;
    
    @Test
    public void getUserList() throws Exception {
        
        MainDAO dao = context.getBean("mainDAO", MainDAO.class);
        
        for(UserVO vo : dao.getUserList()) {
            System.out.println(vo.getName());
        }
    }
}
 
cs


2. Run as JUnit Test 로 실행.

결과 :


콘솔 결과 :


만약 테스트를 기존에 사용하는 DB가 아닌 별도의 DB 에서 하고자 하는 경우는 어떻게 해야할까?

1
2
3
4
5
6
7
8
9
10
11
12
13
14
15
16
17
18
19
20
21
22
23
24
25
26
27
28
29
30
31
32
33
34
35
36
37
38
39
40
41
42
43
44
45
46
47
48
49
50
51
52
53
54
55
56
57
58
59
60
61
62
63
64
65
66
67
68
69
70
71
72
73
74
75
76
77
78
79
package com.jpp;
 
import javax.sql.DataSource;
 
import org.apache.ibatis.session.SqlSessionFactory;
import org.junit.Test;
import org.junit.runner.RunWith;
import org.mybatis.spring.SqlSessionFactoryBean;
import org.mybatis.spring.SqlSessionTemplate;
import org.mybatis.spring.annotation.MapperScan;
import org.springframework.beans.factory.annotation.Autowired;
import org.springframework.boot.jdbc.DataSourceBuilder;
import org.springframework.boot.test.context.SpringBootTest;
import org.springframework.boot.test.context.TestConfiguration;
import org.springframework.context.ApplicationContext;
import org.springframework.context.annotation.Bean;
import org.springframework.context.annotation.Import;
import org.springframework.core.io.Resource;
import org.springframework.core.io.support.PathMatchingResourcePatternResolver;
import org.springframework.test.context.junit4.SpringRunner;
import org.springframework.transaction.annotation.EnableTransactionManagement;
 
import com.jpp.main.dao.MainDAO;
import com.jpp.main.vo.UserVO;
 
@RunWith(SpringRunner.class)
@SpringBootTest
public class MainServiceTest {
    
    @Autowired
    private MainDAO mainDao;
    
//    @Autowired
//    private ApplicationContext context;
    
    @Test
    public void getUserList() throws Exception {
        
        //MainDAO dao = context.getBean("mainDAO", MainDAO.class);
        
        for(UserVO vo : mainDao.getUserList()) {
            System.out.println(vo.getName());
        }
    }
    
    @TestConfiguration
    @MapperScan(value= {"com.jpp.main.mapper"})
    @EnableTransactionManagement
    public static class TestConfig {
 
            @Bean
            public DataSource customDataSource() {
                return DataSourceBuilder.create()
                                        .url("jdbc:mysql://ip:3306/~?useSSL=false&serverTimezone=UTC")
                                        .driverClassName("com.mysql.cj.jdbc.Driver")
                                        .username("id")
                                        .password("pw")
                                        .build();
            }
            
            @Bean
            public SqlSessionFactory sqlSessionFactory(DataSource dataSource)throws Exception{
                    SqlSessionFactoryBean sessionFactory = new SqlSessionFactoryBean();
                    sessionFactory.setDataSource(dataSource);
                    
                    Resource[] res = new PathMatchingResourcePatternResolver().getResources("classpath:mapper/*Mapper.xml");
                    
                    sessionFactory.setMapperLocations(res);
                    
                    return sessionFactory.getObject();
            }
 
            @Bean
            public SqlSessionTemplate sqlSessionTemplate(SqlSessionFactory sqlSessionFactory) throws Exception {
                return new SqlSessionTemplate(sqlSessionFactory);
            }
    }
}
 
cs

위와 같이 @TestConfiguration 을 테스트 코드 내부에 inner Class로 작성하여 테스트만을 위한 DB 설정을 따로 해줄 수 있다.

테스트 코드 내부에 inner Class 로 @TestConfiguration 작성시 별다른 설정이 없어도 @SpringBootTest 가 해당 config Bean을 인식하여 DI 한다.

inner Class가 아닌 외부에 TestConfig.java 파일을 따로 작성해줄 경우 @Import(TestConfig.class) 어노테이션을 @SpringBootTest 와 함께 달아주어야 테스트 코드에서 주입 및 사용이 가능하다.

ex)

@RunWith(SpringRunner.class)
@SpringBootTest
@Import(TestConfig.class)


그럼 이제 위의 테스트 코드를 실행해 보자.

아래와 같은 에러가 발생한다.


The bean 'customDataSource', defined in com.jpp.MainServiceTest$TestConfig, could not be registered. A bean with that name has already been defined in class path resource [com/jpp/main/config/MybatisConfig.class] and overriding is disabled.


동일한 이름을 가진 Bean이 MybatisConfig.class에 이미 정의되어 있어 TestConfiguration 으로 작성한 Bean 을 등록할 수 없단다.


※ 동일한 Bean 의 이름이 존재할 경우 IoC 컨테이너가 Test 코드 내의 TestConfiguration 어노테이션이 달린 Bean 을 우선적으로 인식하여 주입해줄까 싶었는데 그것 까진 안되나보다.

27번라인을 아래와 같이 고쳐주자

@SpringBootTest(classes = {TestConfig.class, MainDAO.class})

: @SpringBootTest 어노테이션에 테스트 DB가 설정되어있는 Bean class와 이를 사용할 class 를 명시


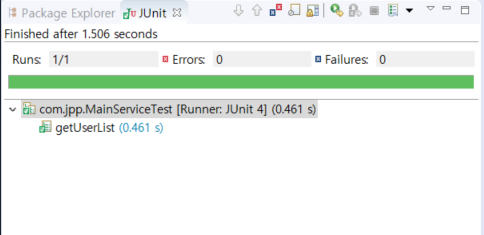
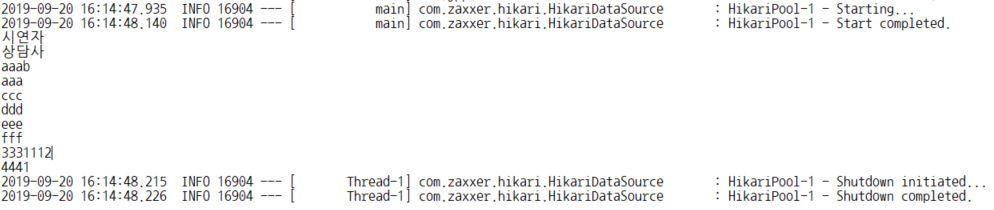
다시 테스트 모드로 실행시켜보면 결과는 성공일 것이다.


※ Test용 Config 를 외부 클래스로 작성하고 테스트코드에서 사용하고자 할 경우

1. 앞서 언급한 @Import 를 사용하는 대신

2. @SpringBootTest(classes = {TestConfig.class}) 와 같이 테스트용 Config 를 명시하여 사용 할 수 도 있다.

   (@Import 를 사용하지 않아도 주입 받아 사용이 가능)


※ 단, 위처럼 프로젝트 내에 동일한 이름의 Bean 이 존재할 경우(2개의 DataSource Bean 이 동일한 이름으로 존재) @SpringBootTest(classes = {TestConfig.class, MainDAO.class})와 같이 테스트에 사용할 Bean을 명시하여 사용해야한다. (@Import만 사용시 앞서 살펴보았던 에러와 동일하게, Bean 이 중복 선언된다는 Exception이 발생한다)


* Controller를 테스트 하는 경우 아래와 같이 가능하다.

1. 테스트 대상 코드

1
2
3
4
5
6
7
8
9
10
11
12
13
14
15
16
17
18
19
20
21
22
23
24
25
26
27
28
29
30
31
32
package com.jpp.main.controller;
 
import java.util.List;
 
import org.springframework.beans.factory.annotation.Autowired;
import org.springframework.stereotype.Controller;
import org.springframework.web.bind.annotation.PostMapping;
import org.springframework.web.bind.annotation.RequestBody;
import org.springframework.web.bind.annotation.RequestMapping;
import org.springframework.web.bind.annotation.ResponseBody;
import org.springframework.web.servlet.ModelAndView;
 
import com.jpp.main.service.MainService;
import com.jpp.main.vo.UserVO;
 
@Controller
public class MainController {
    
    @Autowired
    private MainService mainService;
    
    @PostMapping("/api2")
    @ResponseBody
    public String api(@RequestBody String test) throws Exception {
        String rs = "good";
        
        System.out.println("api2 called !");
        
        return "{\"good\":\"res\"}";
    }
}
 
cs


2. test class

1
2
3
4
5
6
7
8
9
10
11
12
13
14
15
16
17
18
19
20
21
22
23
24
25
26
27
28
29
30
31
32
33
34
35
36
37
38
39
40
41
42
43
44
45
package com.jpp;
 
import static org.springframework.test.web.servlet.request.MockMvcRequestBuilders.get;
import static org.springframework.test.web.servlet.request.MockMvcRequestBuilders.post;
import static org.springframework.test.web.servlet.result.MockMvcResultHandlers.print;
import static org.springframework.test.web.servlet.result.MockMvcResultMatchers.status;
 
import org.junit.Test;
import org.junit.runner.RunWith;
import org.springframework.beans.factory.annotation.Autowired;
import org.springframework.boot.test.autoconfigure.web.servlet.WebMvcTest;
import org.springframework.boot.test.mock.mockito.MockBean;
import org.springframework.http.MediaType;
import org.springframework.test.context.junit4.SpringRunner;
import org.springframework.test.web.servlet.MockMvc;
import org.springframework.test.web.servlet.ResultActions;
 
import com.jpp.main.controller.MainController;
import com.jpp.main.service.MainService;
 
@RunWith(SpringRunner.class)
@WebMvcTest(MainController.class)
public class MainServiceTest2 {
    
    @Autowired
    private MockMvc mvc;
    
    @MockBean
    private MainService mainService;
    
    @Test
    public void api() throws Exception {
        
        
        ResultActions actions = 
                mvc.perform(post("/api2")
                        .contentType(MediaType.APPLICATION_JSON_UTF8)
                        .content("{\"test\":\"val\"}")
                        ).andDo(print());
        
        actions.andExpect(status().isOk());
    }
    
}
 
cs


3. junit 실행 결과


JUnit 과 관련된 트랜잭션(@Transactional) 부분, Mock 객체 등에 대한 내용은 추가 공부 및 정리 후 작성 하겠다.


Spring Boot의 Test코드에 대한 설명이 매우 잘 되어 있는 글


반응형

Image to ASCII : 이미지를 문자로 변환하기


제공사이트 : https://www.text-image.com/convert/ascii.html


TEXT-IMAGE.com :: Convert

  Convert into ASCII For help on using the converter, see the help page. For the HTML converter, click here.

www.text-image.com

[사용법]

1. 사이트 방문하여 상단 HTML/ASCII/MATRIX 중 원하는 문자 형태 선택

2. 파일 선택 및 옵션 지정 후 Convert! 클릭시 변환된 결과물이 나온다.


[사용 예]

위의 구글 이미지를 아래와 같이 문자로 변형 가능.


1) HTML


2) ASCII

3)Matrix


개발자들의 경우 IDE 콘솔 로그 혹은 was 서버 로그등에 활용이 가능하다.


반응형

+ Recent posts